Breaking the Matrix: syncing clipboard between emulator and host
There are many reasons today for emulating Windows 95/98: many good old games, software compatibility, nostalgia or just for fun. And nowadays it's also surprisingly easy to do, there is even an Electron app for that! The fun ends, though, the moment you want to make it interact with the modern side of your computer: emulators like QEMU behave like a black box, with no file sharing nor seamless mouse pointer. I wanted to try some old-school C++ development with Visual Studio 6.0, but copying code in and out of the VM was a pain without any form of copy-paste.
To solve this problem I developed a small utility to sync the clipboard text content between my host operating system (MacOS) and the operating system inside the VM (Windows 98). This is needed because the clipboard is handled at operating system level: when you copy some text from an application an API provided by the OS is called, and your text is copied inside a shared buffer for later use. Our goal is to sync the buffer of the two operating systems without disrupting its normal behaviour.
To achieve this we have to solve different kind of problems:


Two-way communication
When emulating an x86 machine with QEMU you are able to interact with it because several emulated peripherals are provided. Since some of them were pretty standardized even in the 90s, Windows 9x already has drivers for them and you are able to use them. We could also write a custom driver for our shared clipboard and use memory mapped I/O, but that would be too complicated for our small project.


For the scope of this project we use the Serial Port, as it is the simplest one to use and, even though it's extremely slow by today's standards, it's still fast enough for exchanging small text files.
Enabling the Serial Port in QEMU
Even though there are a lot of command line options available to enable a serial port, the simplest one is -serial pty, which defaults to a standard isa-serial device that communicates via ioport 0x3f8.
With this information we can start our emulator:
$> qemu-system-i386 -drive file=hd.img,format=raw -vga cirrus -serial pty
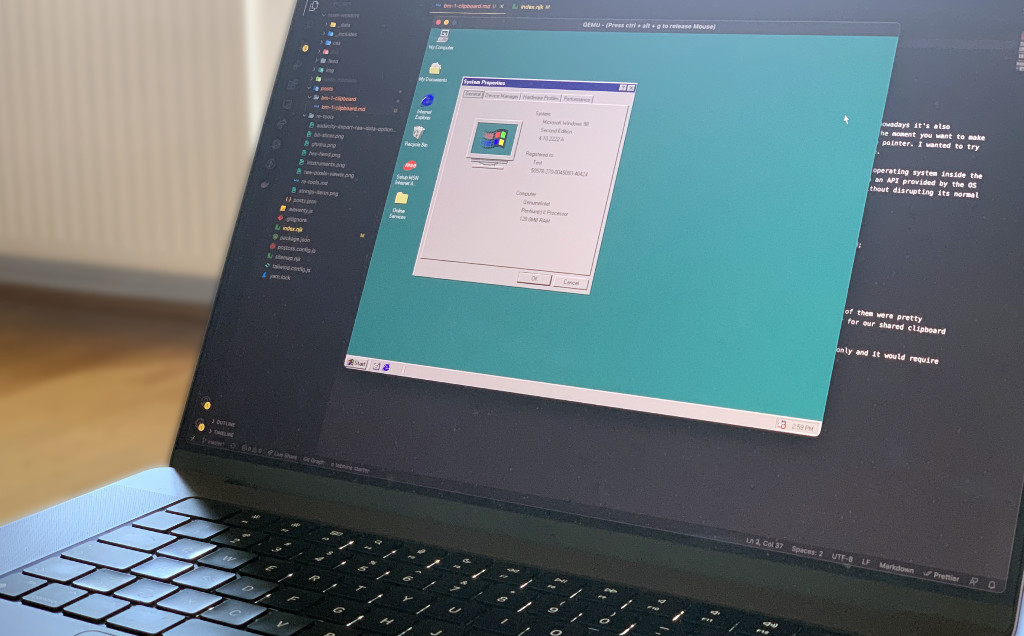
# char device redirected to /dev/ttys000 (label serial0)From this information we can read the path (/dev/ttys000) of the device file that QEMU created for our serial port. By using the HyperTerminal software on Windows and the Unix screen utility on MacOS, we can already test the communication between the two parties.
Using the Serial Port on the Host
We use Node.js to create the application that will run on the host, sending and receiving the clipboard data. Using the serial port with Node.js is pretty simple, thanks to the serialport library, available from NPM.
const SerialPort = require("serialport");
const Readline = require("@serialport/parser-readline");

// If QEMU reports another port path, change it here
const port = new SerialPort("/dev/ttys000");

// This sends data to the virtual machine
port.write("hello world!", "ascii");

// With this we subscribe to new data, printing it to the console when it arrives
port.on("data", console.log);
Running this script we will be able to see an hello world on the HyperTerminal window. When typing characters into it, we will see this kind of output in the Node.js console:
<Buffer 61>
<Buffer 73>
<Buffer 64>
<Buffer 0d>
This, unfortunately, means that we are receiving one character at a time. To solve this problem we can use the parsers provided by the serialport library:
const SerialPort = require("serialport");
const Delimiter = require("@serialport/parser-delimiter");
const port = new SerialPort("/dev/ttys000");

// The Delimiter parser will wait a given character, then it will pass its buffer to the event handler
const parser = new Delimiter({ delimiter: "\f" });
port.pipe(parser);

parser.on("data", (data) => {
  // We also need to convert the buffer to a string
  const text = data.toString("utf-8");

  // Here we print the received data
  console.log(text, data);

  // Our goal here: save the value of `text` in the clipboard of the host os!
});
Using the Serial Port on the Guest (Windows)
The amazing thing about Windows is how backward compatible it is: most guides from today on how to create an application that uses the Serial Port work fine also with Windows 9x! 🤯
That said, Windows handles serial port communication in a very similar way as Unix: opening, reading a writing a special file. In our case the special file we want to open is \\.\COM1. Let's use the Win32 API to do so!
// Let's open the serial port special file
HANDLE hComm = CreateFileA("\\\\.\\COM1",
    GENERIC_READ | GENERIC_WRITE, 0, NULL,
    OPEN_EXISTING, 0, NULL);

if (hComm == INVALID_HANDLE_VALUE) {
    // If wa fail opening the serial port, we should handle the error
}

// Before using the serial port, we are able to configure it with what QEMU expects
DCB dcb = {0};
dcb.DCBlength = sizeof(dcb);
dcb.BaudRate = CBR_9600;
dcb.ByteSize = 8;
dcb.StopBits = ONESTOPBIT;
dcb.Parity = NOPARITY;
dcb.fDtrControl = DTR_CONTROL_DISABLE;
if (SetCommState(hComm, &dcb) == FALSE) {
    // If wa fail to setup the serial port, we should handle the error
}

// To send data to the host, we write bytes to the special file
char sendBuffer[] = "hello world!";
unsigned long nBytesWritten = 0;
WriteFile(hComm, sendBuffer, sizeof(sendBuffer), &nBytesWritten, NULL);

// To receive data from the host, we read from the special file
char receiveBuffer[1024] = {0};
unsigned long nBytesRead = 0;
ReadFile(hComm, &receiveBuffer, sizeof(receiveBuffer), &nBytesRead, NULL);

// Once we are finished with the serial port, we close it
CloseHandle(hComm);
While the call to WriteFile sends the data immediately, the call to ReadFile is blocking: if no data is available it will wait until something is received or a timeout is reached. We are able to customize the timeouts using the SetCommTimeouts function. This is necessary if we want to make polling calls to it, checking periodically if there is new data while being able to do other things in the background.
Reading and writing to the clipboard
Now that we found a way to communicate between the two OSs, we need to find a way to read and write to both clipboards.
With Node.js (Host OS)
A quite old but still valid library for Node.js, called copy-paste, provides two cross-platform functions to either get the current clipboard contents or set it to a new value. It doesn't support subscribing to clipboard events, but we can fix that by using polling:
const ncp = require("copy-paste");
const SerialPort = require("serialport");
const Delimiter = require("@serialport/parser-delimiter");

const port = new SerialPort("/dev/ttys000");
const parser = new Delimiter({ delimiter: "\f" });
port.pipe(parser);

// We store the last value from the clipboard, so that we
// can avoid sending the same value multiple times
let lastClipboard = null;

// When data is received from the serial port...
parser.on("data", (data) => {
  const text = data.toString("utf-8");
  lastClipboard = text;

  // ...save it to the clipboard
  ncp.copy(text);
});

// We check the clipboard value every second
setInterval(() => {
  const data = ncp.paste();
  if (lastClipboard !== data) {
    // Send the content of clipboard to the VM
    port.write(ncp.paste(), "ascii");
    lastClipboard = data;
  }
}, 1000);
This is all the code we need to run in the host OS!
With Windows 9x
Message Loop and Win32
The things here get a bit more complicated, since to do a lot of stuff in Windows we need to implement an actual Win32 application. We won't go into the details of how to write one, since there are already a lot of very good tutorials for that, but the main difference is that we need to build a message loop to receive events from Windows. The message loop is a while loop that continuously checks if there are available events (using GetMessage or PeekMessage) and dispatches them to the correct handler, called WndProc in Win32 jargon.
MSG msg = {0};
while(GetMessage(&msg, NULL, 0, 0) > 0) {
  TranslateMessage(&msg);
  DispatchMessage(&msg);
}
The code above goes into the entry point (WinMain) of our application: if we want to react to some specific events we need to register a new custom window class and handle them in our WndProc function. This way we can listen to clipboard events and react accordingly, sending its content to the host OS.
Monitoring the clipboard
The Win32 documentation about clipboard describes several way to monitor the clipboard content. The simplest way to do that is by using the AddClipboardFormatListener function, but unfortunately it's not available until Windows Vista. The legacy way of doing that is registering a Clipboard Viewer Window. The documentation describes this as useful if we want to create a clipboard content viewer, but we can also use it to simply react to a clipboard content change.
To implement a Clipboard Viewer Window we need to:
- Add our window to the clipboard viewer chain, by using
SetClipboardViewer; - Process the
WM_CHANGECBCHAINmessage in ourWndProc: this event happens when another window is removing itself from the clipboard viewer chain, and we need to repair it accordingly; - Process the
WM_DRAWCLIPBOARDmessage in ourWndProc: this event will happen when the clipboard content changes; - Remove the window from the clipboard viewer chain before it is destroyed by using
ChangeClipboardChain.
Reading and writing to the clipboard
Once we are able to listen to clipboard changes events, we also need a way to actually read and write to it. The available Win32 functions for doing that are:
OpenClipboard: initiates a clipboard operation;GetClipboardData: reads the clipboard contents with a specific format;EmptyClipboard: clears the current clipboard contents;SetClipboardData: places new data into the clipboard;CloseClipboard: releases the clipboard and finishes the operation;
An example application that uses the clipboard will look like this:
#include <string>
#include <windows.h>
const char *wndClassName = "ClipboardExchanger";
HWND nextClipboardViewer = NULL;
void ReadClipboard(HWND hwnd) {
// We open the clipboard and copy its content to a variable
OpenClipboard(hwnd);
HANDLE hData = GetClipboardData(CF_TEXT);
char *pszText = static_cast<char *>(GlobalLock(hData));
std::string text(pszText);
GlobalUnlock(hData);
CloseClipboard();
// Do something with `text`
MessageBox(hwnd, text.c_str(), "Clipboard", MB_OK);
}
void SetClipboard(HWND hwnd, std::string &text) {
// Unused for now, it sets the value of the clipboard
unsigned long length = text.size();
// We need to allocate Windows global memory
HGLOBAL hMem = GlobalAlloc(GMEM_MOVEABLE, length);
char *ptr = (char *)GlobalLock(hMem);
std::copy(text.begin(), text.end(), ptr);
GlobalUnlock(hMem);
OpenClipboard(hwnd);
EmptyClipboard();
SetClipboardData(CF_TEXT, hMem);
CloseClipboard();
}
LRESULT CALLBACK WndProc(HWND hwnd, UINT msg, WPARAM wParam, LPARAM lParam) {
switch (msg) {
case WM_CREATE:
// Here we register our window as clipboard viewer, taking the pointer to
// the next one in the chain
nextClipboardViewer = SetClipboardViewer(hwnd);
return 0;
case WM_DESTROY:
// When the window is closed, we restore the previous clipboard handler
ChangeClipboardChain(hwnd, nextClipboardViewer);
PostQuitMessage(0);
return 0;
case WM_CHANGECBCHAIN:
if ((HWND)wParam == nextClipboardViewer) {
nextClipboardViewer = (HWND)lParam;
} else if (nextClipboardViewer != NULL) {
SendMessage(nextClipboardViewer, msg, wParam, lParam);
}
return 0;
case WM_DRAWCLIPBOARD:
// This will happen when something is copied!F
ReadClipboard(hwnd);
if (nextClipboardViewer != NULL) {
// We forward the message in the clipboard handlers chain
SendMessage(nextClipboardViewer, msg, wParam, lParam);
}
return 0;
default:
return DefWindowProc(hwnd, msg, wParam, lParam);
}
}
// Our application entry point
int WINAPI WinMain(HINSTANCE hInstance, HINSTANCE hPrevInstance,
LPSTR lpCmdLine, int nShowCmd) {
// Registers a new window class
WNDCLASSEX wc = {0};
wc.cbSize = sizeof(WNDCLASSEX);
wc.lpfnWndProc = WndProc;
wc.hInstance = hInstance;
wc.hbrBackground = (HBRUSH)(COLOR_WINDOW);
wc.lpszClassName = wndClassName;
RegisterClassEx(&wc);
// Creates an instance of the window
HWND hwnd = CreateWindowEx(
WS_EX_CLIENTEDGE, wndClassName, "ClipboardExchanger", WS_OVERLAPPEDWINDOW,
CW_USEDEFAULT, CW_USEDEFAULT, 240, 120, NULL, NULL, hInstance, NULL);
// Our message loop
MSG msg = {0};
while (msg.message != WM_QUIT) {
if (GetMessage(&msg, NULL, 0, 0) > 0) {
TranslateMessage(&msg);
DispatchMessage(&msg);
}
}
return msg.wParam;
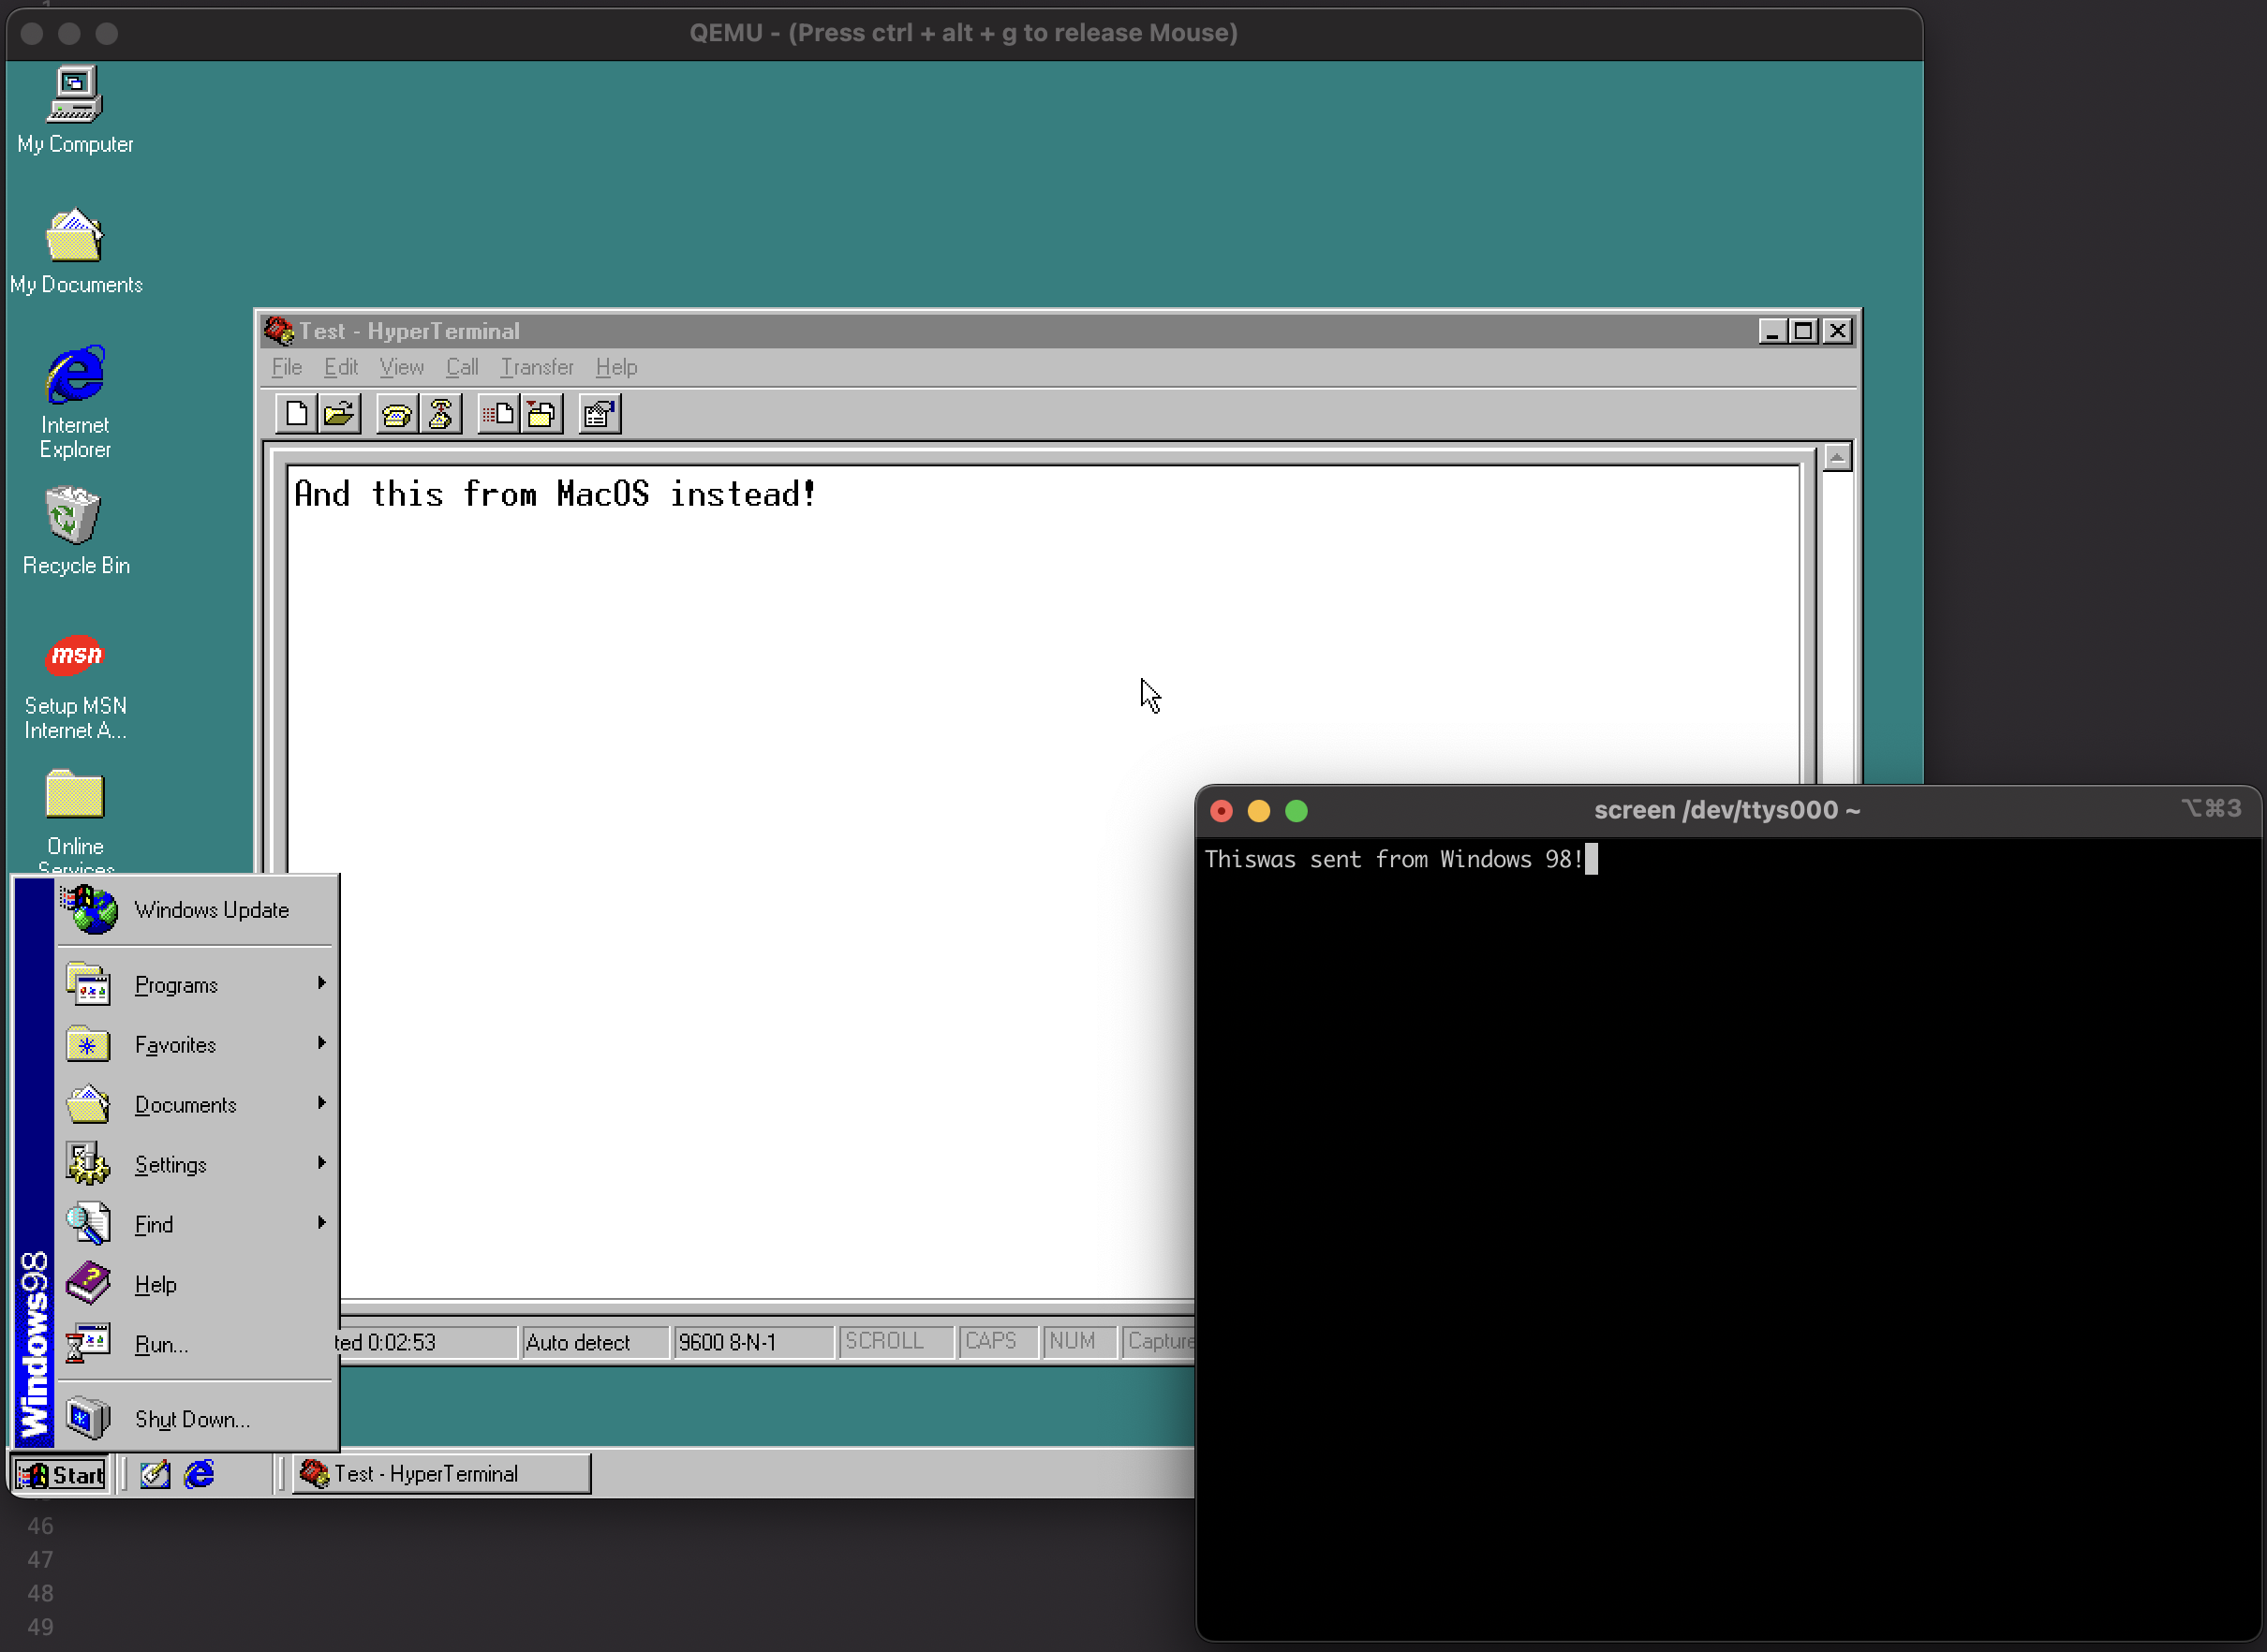
}Once we compile and run our application we can see how it is able to show a message box with the clipboard content every time we perform a copy operation:
Putting everything together
So far we talked about how to handle the clipboard and two-way communication, both on the host and guest operating systems. We can now finish the code that needs to run on the guest machine. To do so, we need to apply some changes to the clipboard example app.
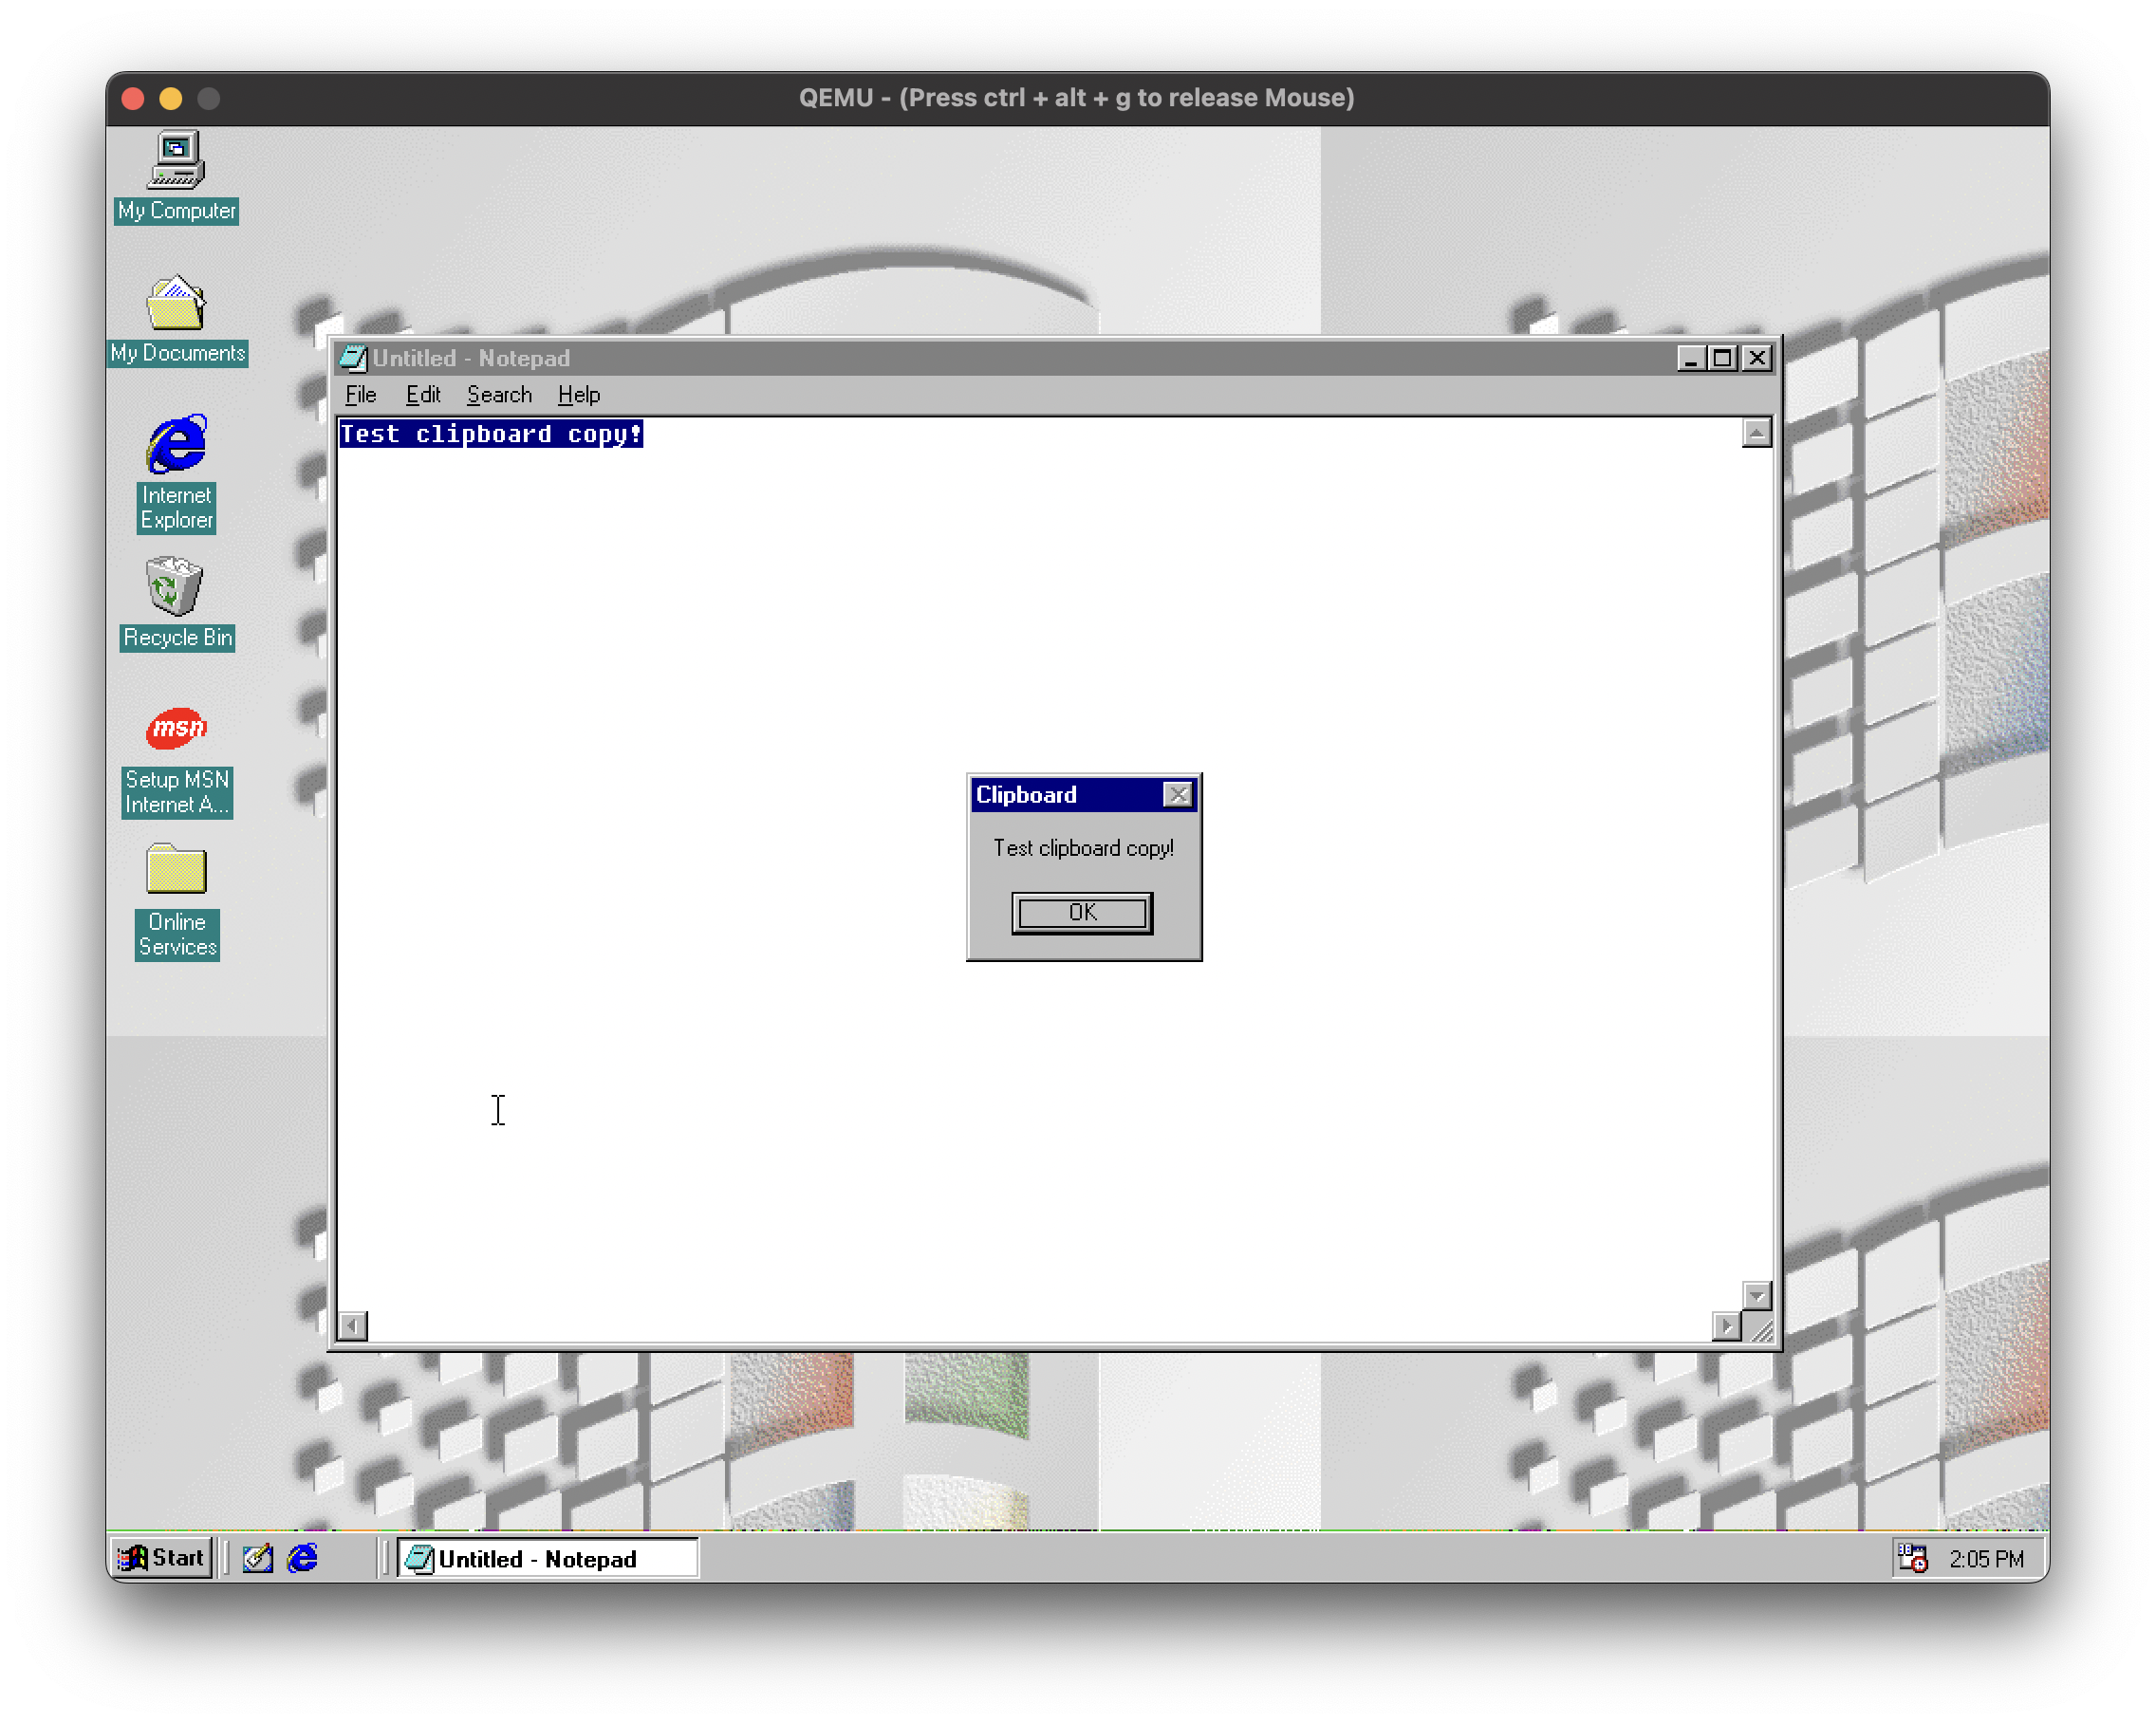
- We need to, first of all, initialize the serial port communication
HANDLE hComm;

void SetupSerialPort(HWND hwnd) {
  hComm = CreateFileA("\\\\.\\COM1",
    GENERIC_READ | GENERIC_WRITE,
    0, NULL, OPEN_EXISTING, 0, NULL);

  if (hComm == INVALID_HANDLE_VALUE) {
    MessageBoxEx(hwnd, "Error opening serial port", "Error", MB_OK, NULL);
    exit(1);
  }

  // We setup the serial port to use 9600 bauds and default settings
  DCB dcb = {0};
  dcb.DCBlength = sizeof(dcb);
  dcb.BaudRate = CBR_9600;
  dcb.ByteSize = 8;
  dcb.StopBits = ONESTOPBIT;
  dcb.Parity = NOPARITY;
  dcb.fDtrControl = DTR_CONTROL_DISABLE;
  if (SetCommState(hComm, &dcb) == FALSE) {
    MessageBoxEx(hwnd, "Error setting up serial port", "Error", MB_OK, NULL);
    exit(1);
  }

  // We want out read operation to timeout quickly (50ms) in case there is no data available,
  // so that it won't be blocking anymore and we can use polling for it
  COMMTIMEOUTS timeouts = {0};
  timeouts.ReadIntervalTimeout = 50;
  timeouts.ReadTotalTimeoutConstant = 50;
  timeouts.ReadTotalTimeoutMultiplier = 10;
  timeouts.WriteTotalTimeoutConstant = 50;
  timeouts.WriteTotalTimeoutMultiplier = 10;
  SetCommTimeouts(hComm, &timeouts);
}- We modify the
SetClipboardfunction to read from the serial port and write its content to the clipboard buffer
// When we set the clipboard value from the serial port, our own clipboard handler will fire too, causing an infinite loop
// For this reason, we need to keep track if it was us setting the last value
bool justReadt = false;

void SetClipboard(HWND hwnd) {
  // We use a vector of char as buffer
  std::vector<char> chars;
  // The last byte readt, we poll the serial port character by character
  char readData;
  unsigned long nBytesRead = 0;

  do {
    ReadFile(hComm, &readData, sizeof(readData), &nBytesRead, NULL);
    if (nBytesRead > 0) {
      // We have a new char, put it in the buffer
      chars.push_back(readData);
    }
  } while (nBytesRead > 0);

  // Once the data is finished, ReadFile will set nBytesRead to 0 and the loop will end

  if (chars.size() > 0) {
    // We need to null-terminate our string
    chars.push_back(0);

    unsigned long length = chars.size();
    HGLOBAL hMem = GlobalAlloc(GMEM_MOVEABLE, length);
    char* ptr = (char*)GlobalLock(hMem);
    std::copy(chars.begin(), chars.end(), ptr);
    GlobalUnlock(hMem);
    OpenClipboard(hwnd);
    EmptyClipboard();
    SetClipboardData(CF_TEXT, hMem);
    CloseClipboard();

    justReadt = true;
  }
}- We need to modify our
ReadClipboardhandler to send the data to the host OS when new text is copied
void ReadClipboard(HWND hwnd) {
  OpenClipboard(hwnd);
  HANDLE hData = GetClipboardData(CF_TEXT);
  char* pszText = static_cast<char*>(GlobalLock(hData));
  std::string text(pszText);
  GlobalUnlock(hData);
  CloseClipboard();

  // Send the contents to the host with the serial port
  if (text.size() > 0 && !justReadt) {
    unsigned long written;
    WriteFile(hComm, text.c_str(), text.size(), &written, NULL);
    // We also write the delimiter to let the host know when the data is finished
    WriteFile(hComm, "\f", 1, &written, NULL);
  }

  justReadt = false;
}- We need to change our blocking event loop into a non-blocking one, using
PeekMessage
MSG msg = {0};
while (msg.message != WM_QUIT) {
  if (PeekMessage(&msg, NULL, 0, 0, PM_REMOVE) > 0) {
    // A message is available, handle it
    TranslateMessage(&msg);
    DispatchMessage(&msg);
  } else {
    // If not, try polling the serial port
    SetClipboard(hwnd);
  }
}
The final code for the guest application can be found on the Github repository.
Compiling C++ for Windows 9x
We shown a lot of C++ code that is supposed to run on Windows 9x, but how do we build an executable that actually runs on such an old operating system?
Thankfully, we have two options for compilers:
- The GCC Compiler bundled with the old Dev C++ 5;
- Microsoft's Visual C++ Compiler and IDE, that can still be found on WinWorld.
Alternatively, we can also use the Visual C++ compiler on our host machine to build our application, using Wine. I've prepared a Docker image for this purpose which already bundles the compiler. You can compile the application from the cloned repository folder with this single command:
docker run -it --rm -v $(pwd):/prj giulioz/vc6-docker \
  wine /opt/vc/BIN/CL.EXE z:\\prj\\cpp\\clip98.cpp \
  /IZ:\\opt\\vc\\INCLUDE \
  /link \
    /LIBPATH:Z:\\opt\\vc\\LIB user32.lib \
    /out:Z:\\prj\\clip98.exe
Final result
We are now able to run the sync applications both in the guest and host OS. While on the guest it's enough to double click on the exe file, on the host we need to run QEMU with the serial port enable (as described previously) and run the javascript part with node on another terminal.
